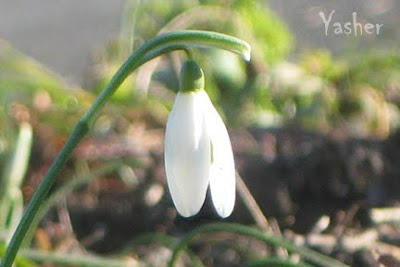
Wonko took a different route with this photo than I did yesterday. So I made him walk me through his steps today since I'm home, feeling like crap anyways. I still think his version looks better and I’m still not happy with my work, though I did pretty much the same thing. I don’t think I have the eye, patience or skill that he does. Still, I think it looks more like what I was going for than what I did yesterday.
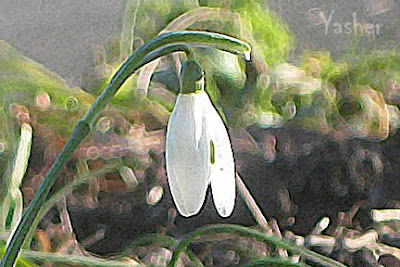
We duplicated the layer and applied Smart Sharpen filter, with the radius low and the amount adjusted to whatever looked right and used the blending mode Luminosity.
Then created a layer mask (hide all) and painting white on the areas we wanted to reveal as sharpened. Adjusted opacity on this layer to around 75%.
Then created an adjustment layer and applied Curves, adjusting the contrast (we used the default Medium Contrast), then in the adjustment layer, we painted black over the background to further blur it.
I duplicated the background layer, applied a Soft Light blending mode and change opacity to about 30%.
There’s only so much you can do with a mediocre, blurry picture, though I image those with more editing skill could do something better than this.
The second photo, I did a dry brush filter while the photo was at 300 ppi, then I cropped it to 72 ppi and did a cross hatch filter. It looks more like a painting, but it seems I like most of my photos better that way. Original photo is in the earlier post.
No comments:
Post a Comment